

If you have any technical questions or concerns, go to My Esri or call +880 1712 533 155. For requests by email please contact support@esribangladesh.com.bd.
FAQs
- How do I authorize my newly purchased Desktop licenses?
-
From the start menu, select ArcGIS Administrator.
-
Choose the correct product folder (i.e. desktop or engine) and select a single product.
-
Click Authorize now to start the Software Authorization Wizard.
-
Select I have received an authorization file from Esri… and navigate to the provision file you received. If you do not have a provisioning file, select I have already installed my software and need to authorize it.
-
Select Authorize with Esri now using the internet and click Next.
-
Complete the authorization information and click Next. If you are using a provision file, the details should be automatically filled in, but you can still edit the file when needed.
-
Complete the Software Authorization Number form and click Next. If you are using a provision file, the details should be automatically filled in, but you can still edit the file when needed.
-
If you want to evaluate any extensions, select “I have authorization number(s) to authorize one or more extensions” in the Authorize Software Extensions form. If you are using a provision file, the details should be automatically filled in, but you can also manually add the authorization numbers and click Next.
-
If you do not want to evaluate any extensions, select “I do not want to evaluate any extensions at this time” and click Next.
-
Click Finish to complete the software authorization process.
-
- How do I deauthorize single-use licenses?
-
From the start menu, select ArcGIS Administrator.
-
Once the ArcGIS Administrator dialog box appears, click Deauthorize.
-
Click Yes to continue.
-
Once the Software Authorization Wizard dialog box appears, select Deauthorize with Esri now using the internet. Click Next.
-
Click Finish once completed.
-
- How do I access My Esri?
Visit the My Esri website which will redirect you to the sign in page for your ArcGIS account. If you do not have an account, you will be prompted to create one. When you have a My Esri account, you will get administrative information about your organization. These details of information are very important for further contact with our support team i.e.: customer number.

- What if I cannot see the “Organization Profile” tab in My Esri?
If you cannot access this tab, your account does not have the correct permissions to view your organizations. There are several different options to resolve this issue:
-
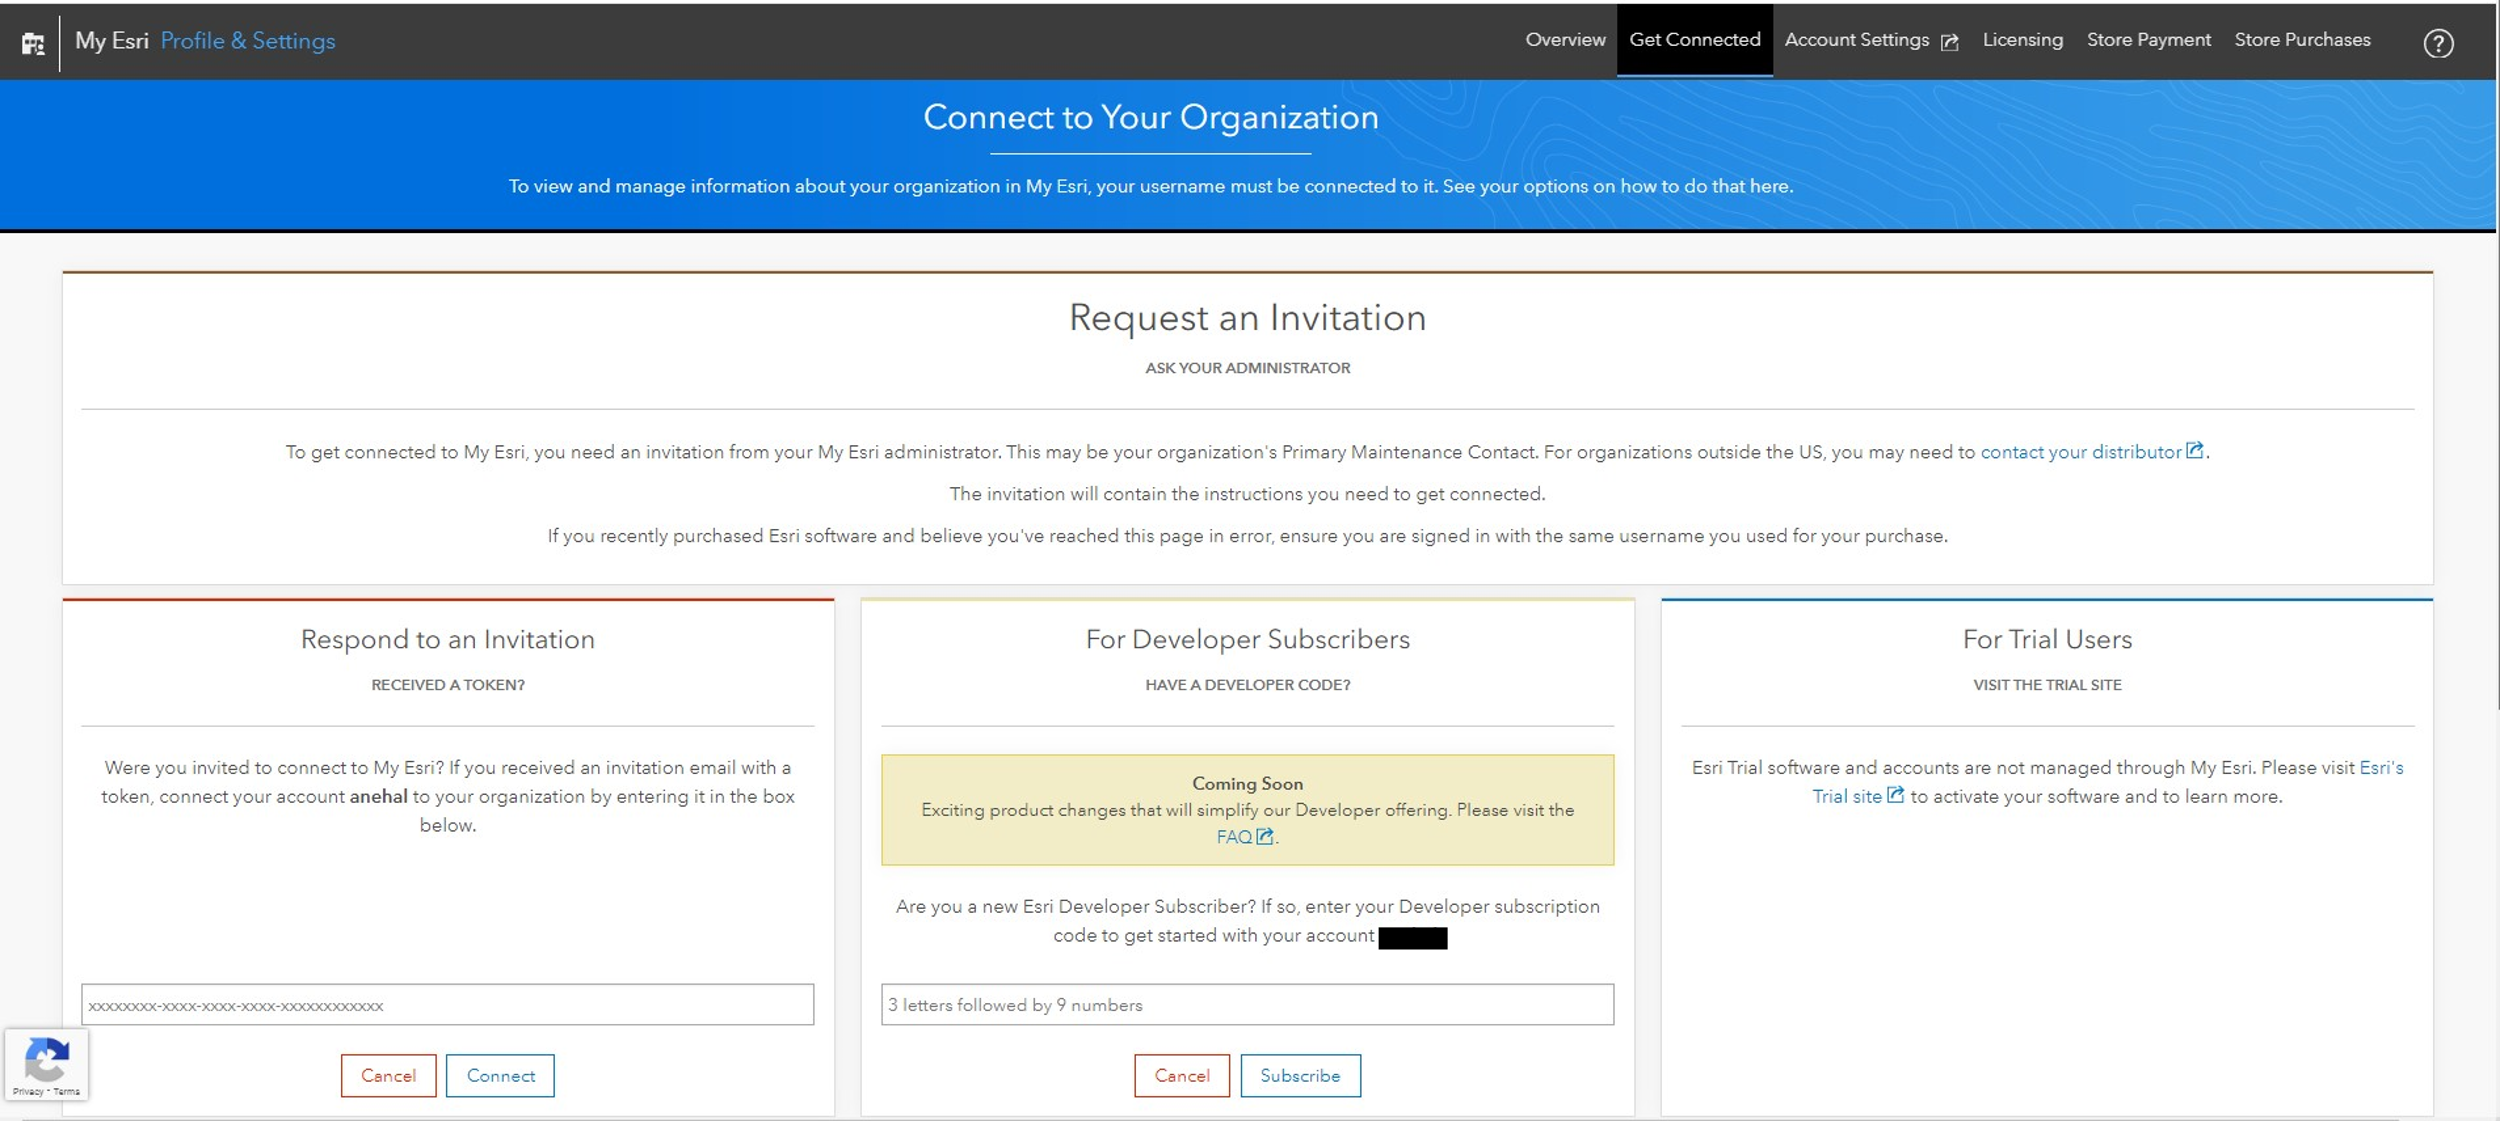
If you have recently purchased ArcGIS software, you would have received an email with a link to connect to your organization or a token, which can be manually entered to enable visibility of the “Organization Profile” tab for your account. The token option can be found by navigating to: My Esri > Profile & Settings > Get Connected > Connect with a Token.
-
If you are a new user, you can request permission to connect to an organization via My Esri. Note that you can be connected to multiple organizations if necessary, by navigating to: My Esri > Overview > Request Additional Permissions.
-
New users can also reach out to their primary maintenance contact or ArcGIS administrator to request an invitation to view an organization. If you are the primary contact and you need instructions on this process, please contact Esri Bangladesh Support. If you have recently purchased software and need instructions on this process, please contact Esri Bangladesh Support.
-
If you have a free-trial license, a temporary license from an Esri Press book or workbook, or a student trial, you are not eligible to view organization information on My Esri and therefore do not need to be connected to an organization. Instead, please visit Esri’s trial site for information on how to activate your trial software; or visit the Esri Press site for free trials related to workbook
-
If the options outlined above do not apply, please contact Esri Bangladesh or for technical support, kindly contact Esri Bangladesh Support including your customer number and username in the email.
-
- How do I invite users to my organization in My Esri?
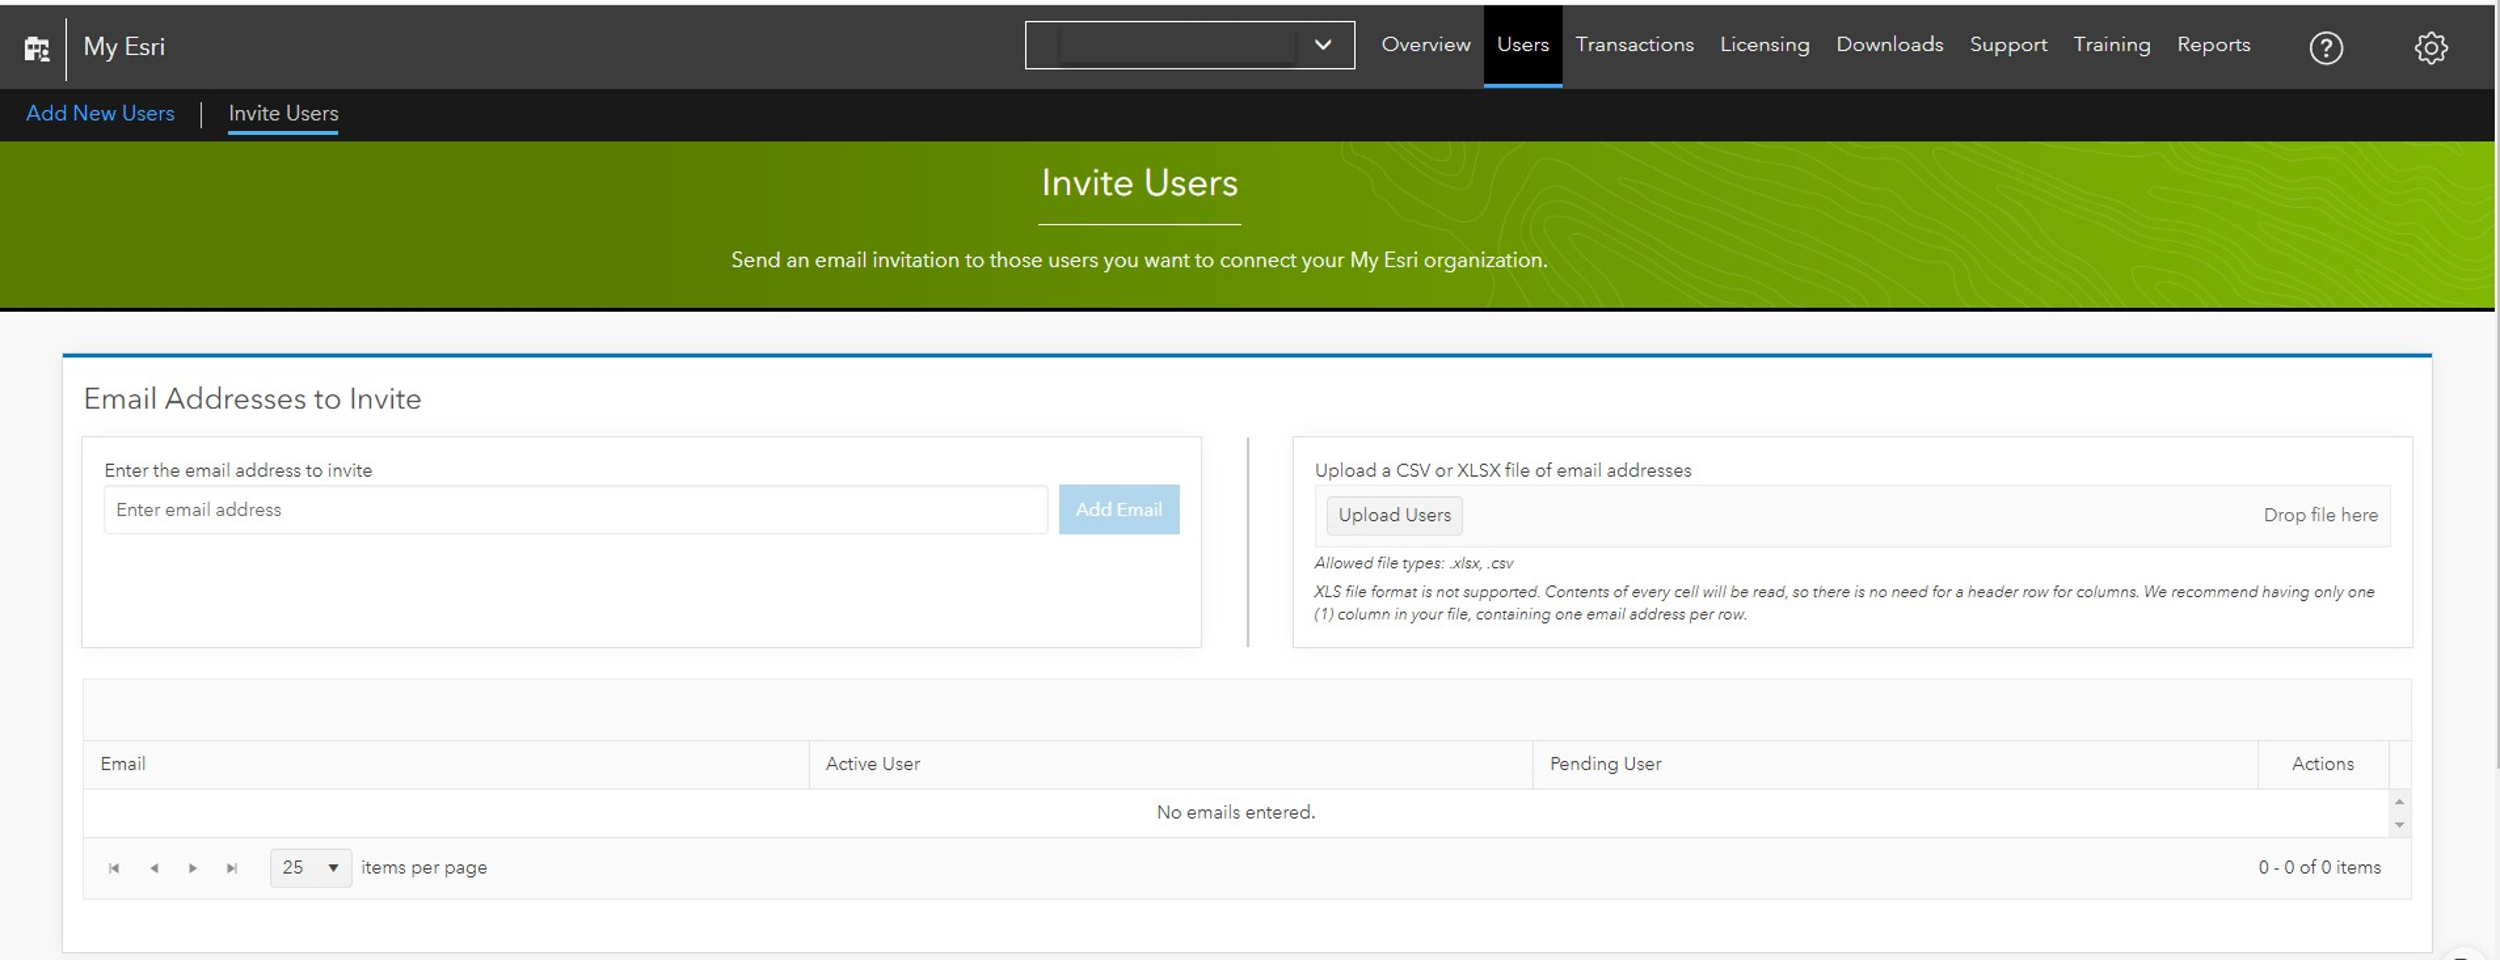
Administrators may invite users to connect to their organization within My Esri (Navigate to: My Esri > Users > Invite Users). Please follow the steps below to complete this workflow:
Step 1: Provide email addresses to invite – Provide a single email address for a single user or upload a CSV or Excel table (XLSX file) with one column of email addresses (one per row).
Step 2: Permissions to grant & send invitation – Permissions denote what the user can see within My Esri. This includes the ability to grant or take away all permissions available to you as an administrator.
Each permission has a description that you can view by pointing to the Information icon
 .
.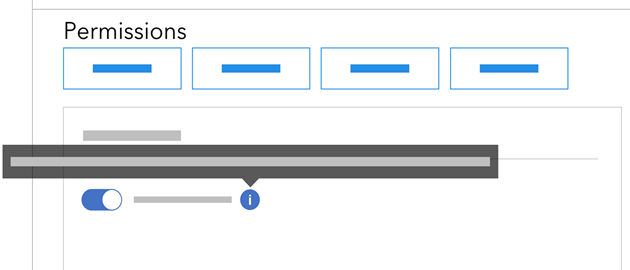
You can also set a time limit for permissions, which may be useful when employing contractors or students who only need access for a specified time.
Once the invitation is sent, the invited users receive an email with a link to connect to the organization. When the user signs in to My Esri, their username is added to the pending permissions and made active.
Unanswered invitations will be deleted after six weeks.
Before the email is sent, you can change the language and message content sent to the user. You can also preview the email before it is distributed.

Manage permissions – Lastly, administrators can change permissions for users at any time in the Manage Users tab by selecting the pen icon indicated below. This will direct you to the permissions page outlined in Step 2.
- How can I troubleshoot incidents?
1. Verify the source of the incident is an Esri software error. If not, and the problem has resulted from an error in a database, hardware or network software from another vendor, Esri Bangladesh can work with you and the other vendor to resolve the issue.
2. Verify the technical incident is not caused by missed step or human error.
Should you need to reach out to technical support team, please gather the following information to help us assist you better:
-
Determine whether the problem occurs on one, more than one or all workstations/servers.
-
Determine whether the problem is specific to one, more than one or all datasets.
-
Determine whether the problem occurs randomly or consistently.
-
Check any recent changes in your computing environment that could have potentially caused the problem, including:
-
The version of the product, database, operating system and/or network software
-
Client or server components
-
Server configuration
-
Security settings
-
- What can I do if I encounter an issue when working with ArcGIS Online, ArcGIS Pro or ArcGIS Enterprise?
Please refer to the frequently asked questions for the following ArcGIS products.